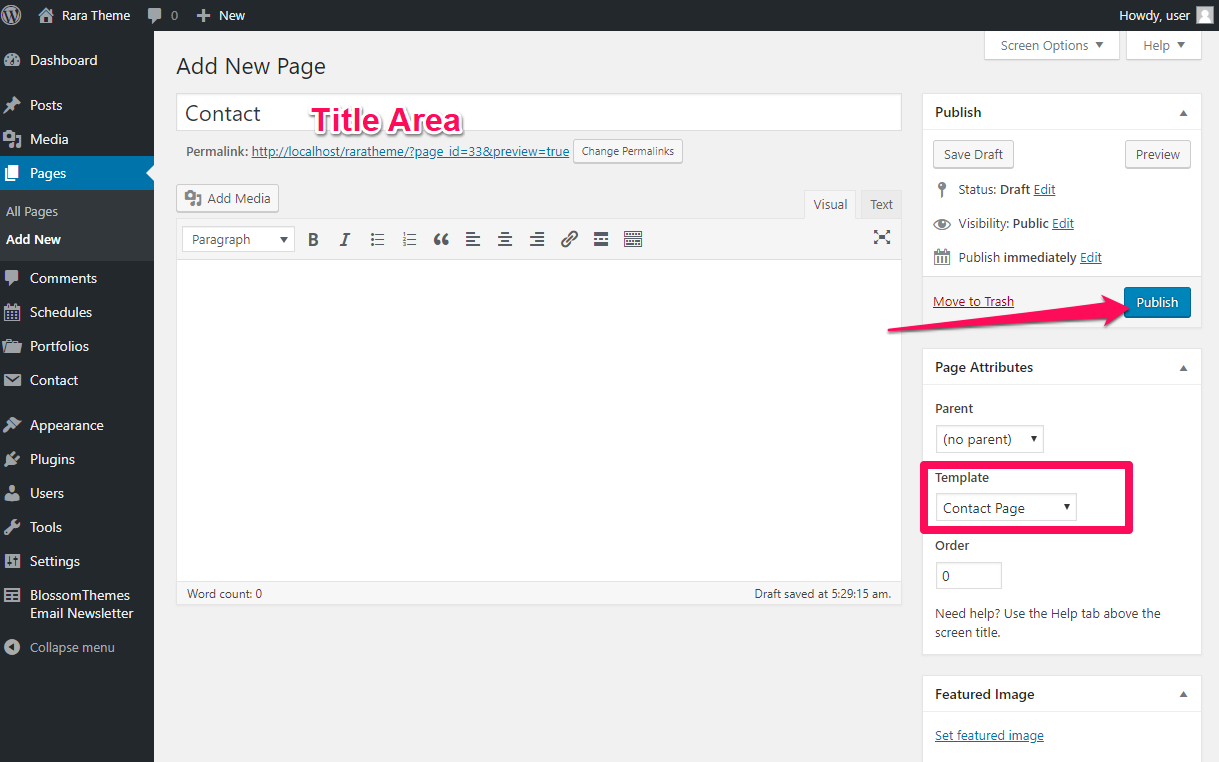
Please follow the below video tutorial or the following steps to configure Contact Page Settings
Note: When you create a Contact page, Please select the Contact Page template in the page attributes to get predefined Contact template.
Please create a Contact Page following the below steps:
- Go to Pages> Add New
- Enter the Title for the Page
- Select the Contact Page template
- Click on Publish
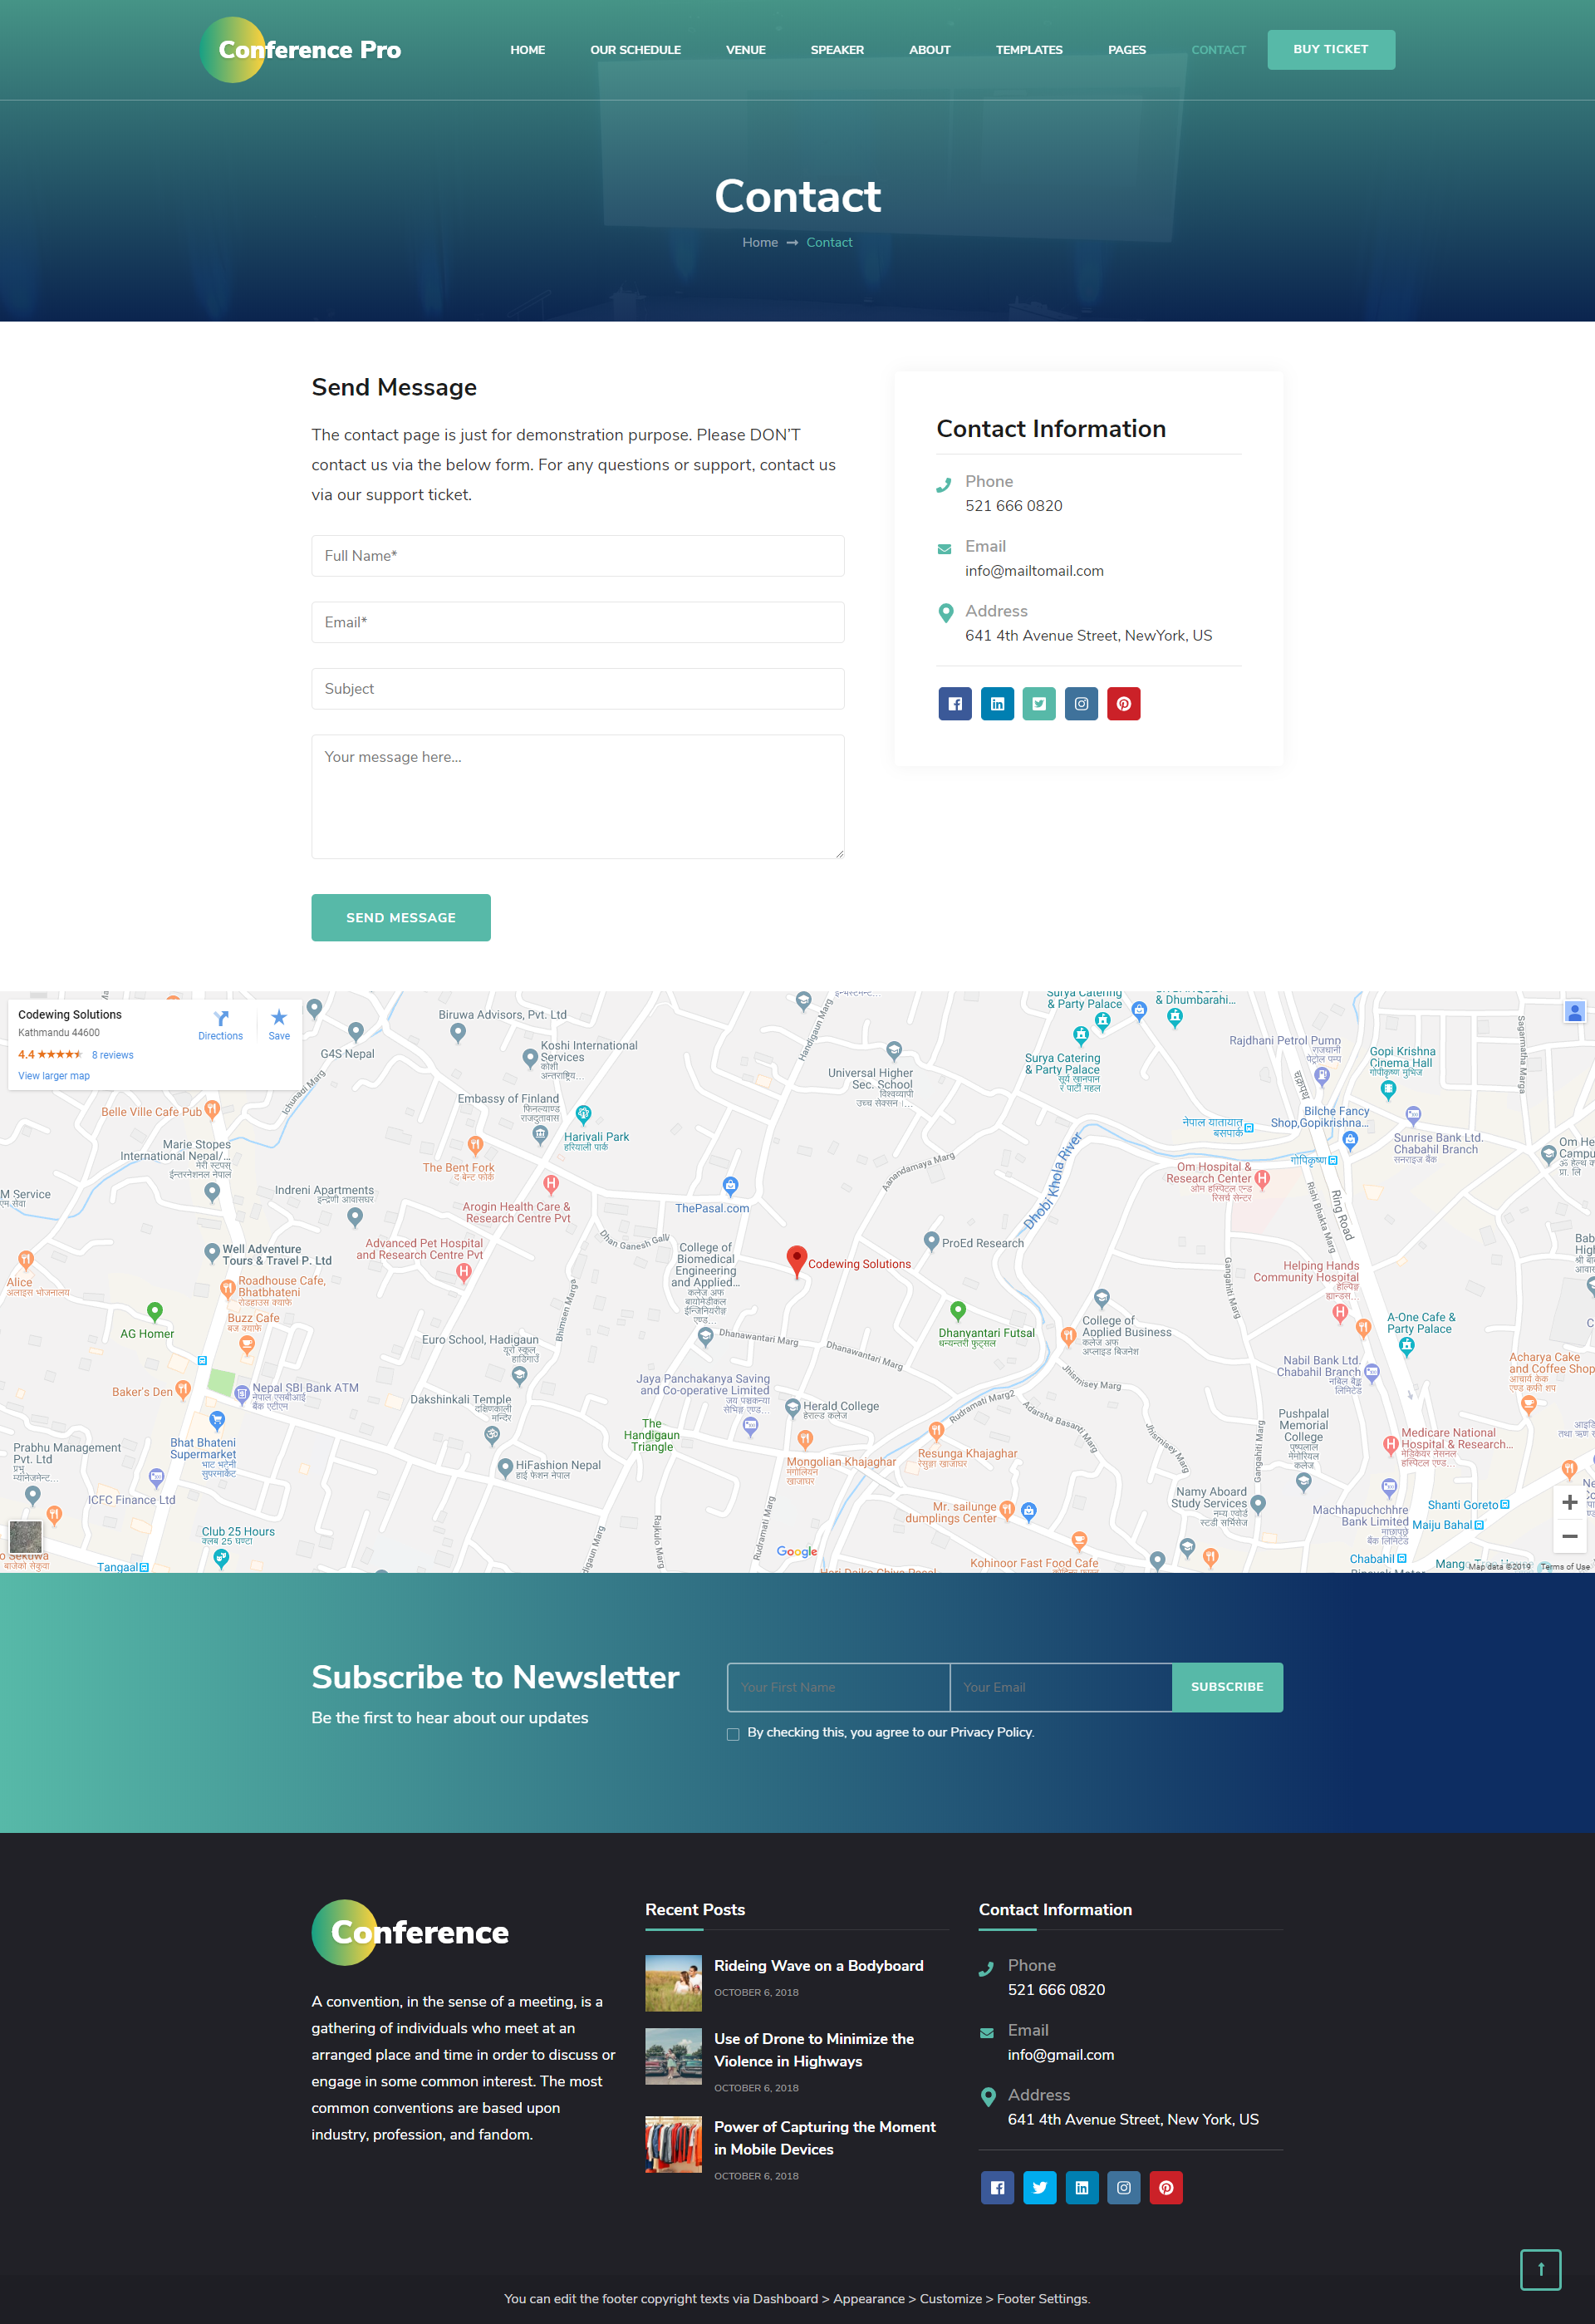
How to Configure Contact Template Details?
Please follow the below steps to configure the contact section on your website homepage.
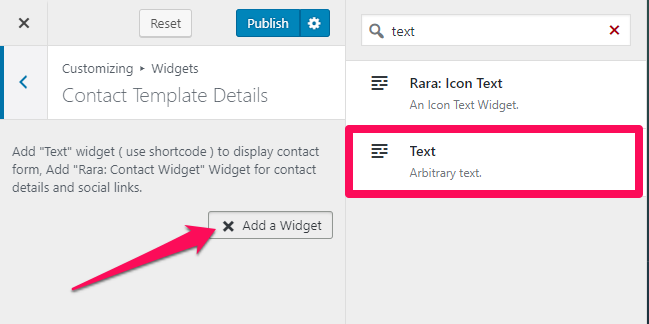
- Go to Appearance> Customize> Contact Page Settings> Contact Template Details
- Click on Add a Widget & Select Text Widget
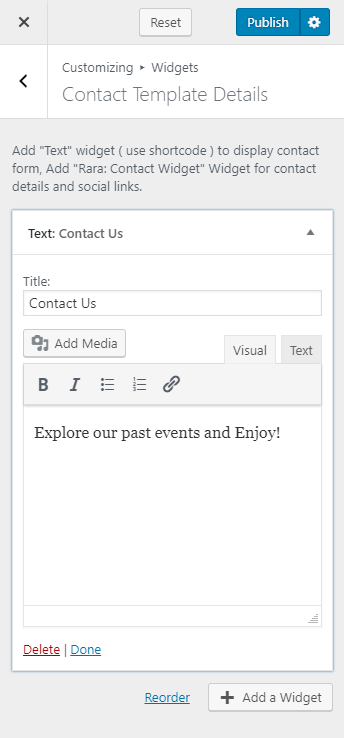
- Enter the Contact Template Section Title and Description
- Click on Done
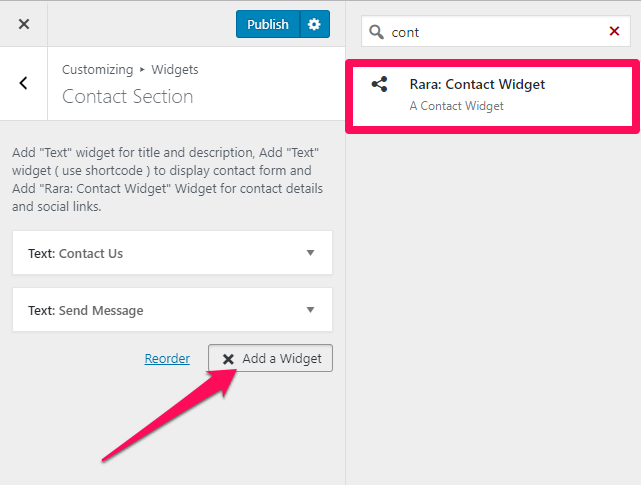
- Again, Click on Add a Widget & Select Text Widget
- Enter the Title, Description, and CF7 Shortcode. (Go to Dashboard> Contact Form> Add New to get the Contact Form Shortcode.)
- Click on Done

- Click on Add a Widget
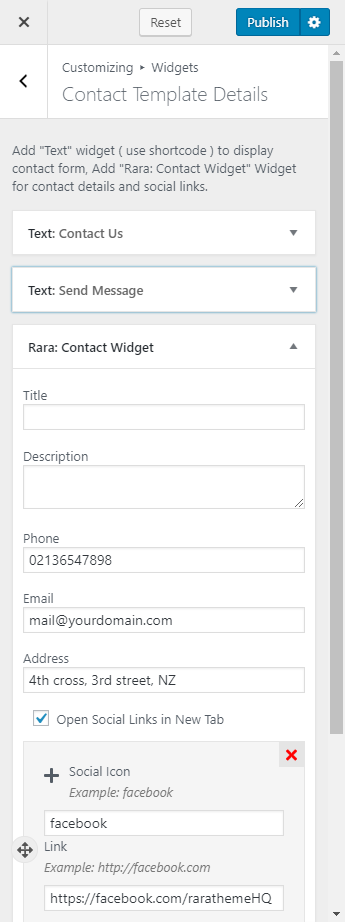
- Select Rara: Contact Widget
- Enter the Contact Detail Title, Contact Phone, Contact Email, and Contact Address to display on the front page of your website.
- Click on Add Social Icon and add your social media icon and links to show social media links in the contact section.
- Click on Done
- Click on Publish
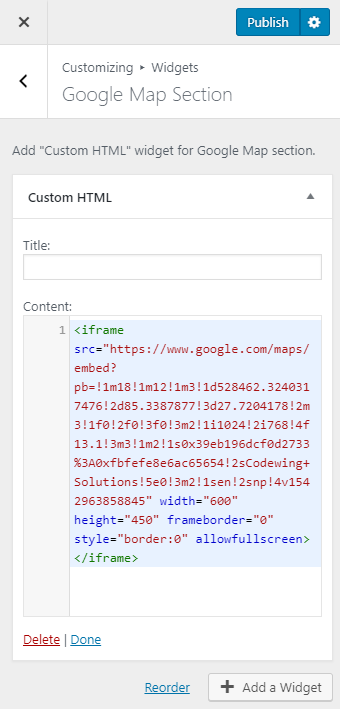
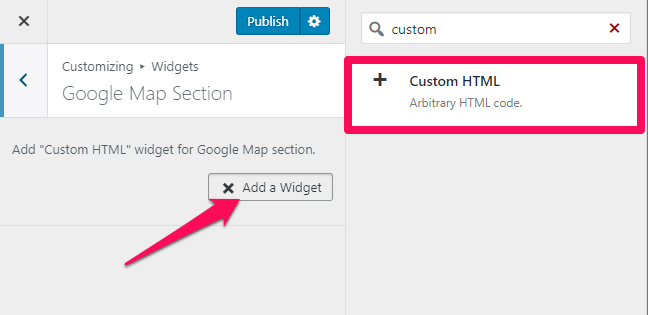
How to Configure Contact Template Map Settings?
Please follow the below steps to show your location map on the contact page of your website.
- Go to Appearance> Customize> Front Page Settings> Map Section
- Click on Add a Widget
- Select Custom HTML
- Enter the Google Map iframe code
- Click on Publish