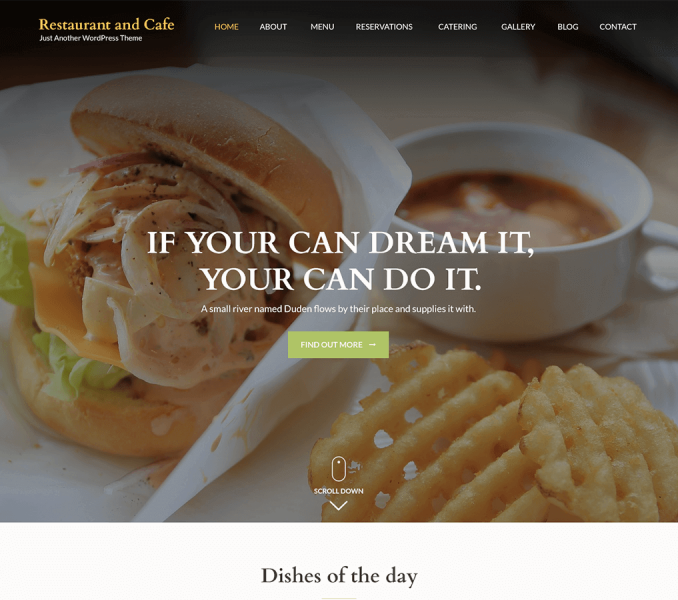
You can attract your visitors using the banner section. You can add image, video, or slider in the banner section.

Banner Settings
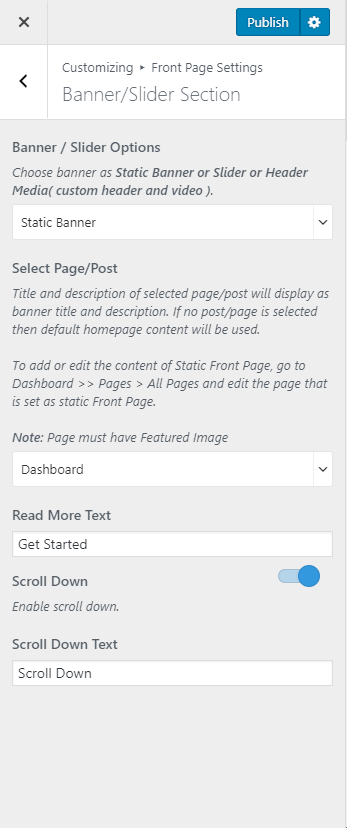
Static Banner
- Go to Appearance> Customize> Front Page Settings> Banner/Slider Section
- Select “Static Banner” in Banner Options.
- Select a Post/Page. Title and description of selected page/post will be displayed as banner title and description.
- Feature Image of selected post/page will be displayed as a banner image.
- Enter Read More text.
- Enter Scroll Down Text.
- Click Publish.
Banner as Slider
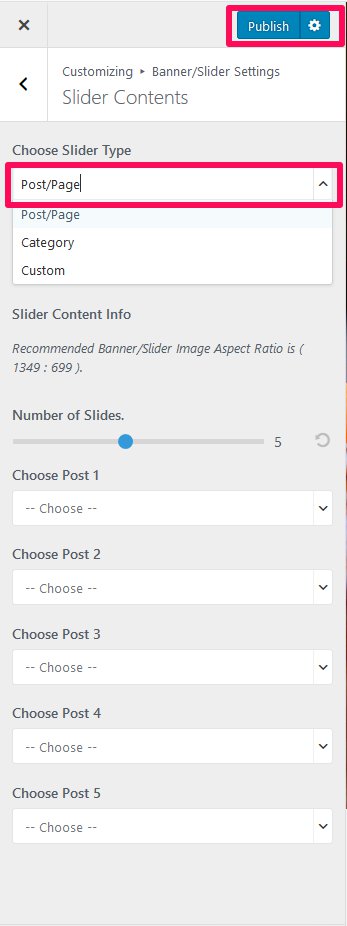
Creating Slider using Post/Page
- Go to Appearance> Customize> Front Page Settings> Banner/Slider Section
- Select Banner as Slider from Banner/Slider Options
- Choose Slider Type to Post/Page
- Enter the number of slides you want to show in the banner. You must refresh the page after you alter the number of slides to see the changes.
- Choose Posts/Pages to be displayed as slides. You can choose up to ten posts/pages. The featured image of the posts/pages will appear on the slider.
- Enter Read More text.
- Enable Slider Auto to make slides transition automatically without clicking (Blue is enabled).
- Enable Slider Loop to allow the slider to repeat selected posts automatically.
- Enable Mouse drag to drag and change the slides.
- Enable Slider Caption to show the post title to appear on the slider post image.
- Enable Full Image if you wish to display the full image on the slider rather than the cropped image. (In this case, make sure that all the selected images have the same image size, so that the design is maintained)
- Choose Slider Animation type.
- Select the slider speed and enable whether to disable autoplay on mouse hover.
- You can create a slider using page/post, category, or custom slides. Choose the type you like and create slides. Below is the instruction on how to use each slide type.
- Click Publish.
Creating Slider using Category
- Go to Appearance> Customize> Front Page Settings> Banner/Slider Section
- Select Banner as Slider from Banner/Slider Options
- Choose Slider Type to Category
- Select the number of slides you want to show in the banner. You must refresh the page after you alter the number of slides to see the changes.
- Choose the Slider Category.
- The featured Image of the posts under the selected category will appear as Slide Images.
- Post Title of the post under the selected category will appear as Slide Title.
- Post Excerpt will appear on the Slider as slide Content. The first few sentences of the post content will appear as slide content if the Post excerpt is not entered.
- Enter Read More text.
- Enable Slider Auto to make slides transition automatically without clicking (Blue is enabled).
- Enable Slider Loop to allow the slider to repeat selected posts automatically.
- Enable Mouse drag to drag and change the slides.
- Enable Slider Caption to show the post title to appear on the slider post image.
- Enable Full Image if you wish to display the full image on the slider rather than the cropped image. (In this case, make sure that all the selected images have the same image size, so that the design is maintained)
- Choose Slider Animation type.
- Select the slider speed and enable whether to disable autoplay on mouse hover.
- You can create a slider using page/post, category, or custom slides. Choose the type you like and create slides. Below is the instruction on how to use each slide type.
- Click Publish.

Creating Slider using Custom slides
- Go to Appearance> Customize> Front Page Settings> Banner/Slider Section
- Select Banner as Slider from Banner/Slider Options
- Choose Slider Type to Custom.
- Click on Add new slide.
- Click Add Image to upload an Image.
- Enter Title, Description and Link for the Slide.
- Click Add new Slide to add new slides. Click on Slide No. (1,2,3…) to modify the slides
- Enter Read More text.
- Enable Slider Auto to make slides transition automatically without clicking (Blue is enabled).
- Enable Slider Loop to allow the slider to repeat selected posts automatically.
- Enable Mouse drag to drag and change the slides.
- Enable Slider Caption to show the post title to appear on the slider post image.
- Enable Full Image if you wish to display the full image on the slider rather than the cropped image. (In this case, make sure that all the selected images have the same image size, so that the design is maintained)
- Choose Slider Animation type.
- Select the slider speed and enable whether to disable autoplay on mouse hover.
- You can create a slider using page/post, category, or custom slides. Choose the type you like and create slides. Below is the instruction on how to use each slide type.
- Click Publish

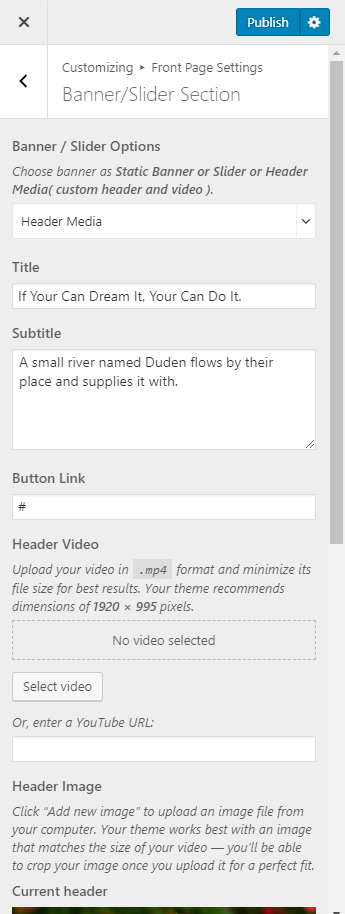
Banner as Image or Video (Header Media)
- Go to Appearance> Customize> Front Page Settings> Banner/Slider Section
- Choose “Header Media” in Banner Options.
- Enter the title and subtitle. This will be displayed above the video/image.
- Add Button Link.
- Upload and select a video. You can also enter a youtube link. If you have the video link or the video, the image will not be displayed.
- If you want to put an image in the banner, click on “Add new image” to add images to the banner section.
- Select the image you want to display on the banner section. You can also randomize added images. When you click on “Randomize suggested headers” button, the uploaded banner images will be displayed randomly every time your website is loaded. Make sure you don’t have video select if you want to show the image.
- Enter Read More Button.
- Enable Scroll Down
- Enter Scroll Down Text Button.
- Click on Publish