You can modify different sections of the contact page here. You must be on the contact page to configure the sections. So, you need to create a contact page first.
Create a Contact Page
- Go to Dashboard > Pages > Add New.
- Enter the Title for the Contact page.
- Enter the contents for the contact page in content area.
- Select Featured Image
- Choose “Contact Page” Template
- Click on Publish/Update.

Add/Configure Contact Form
You must install and activate Contact Form 7 Plugin to add or configure contact forms. After you activate the plugin, follow these steps.
- Go to Contact> Add New Menu from the WordPress Dashboard
- Enter the name for the contact form in title section
- Enter the Fields and Labels for contact form in Form tab
- In the Mail tab, you can configure the email address for receiving the emails from the contact form
- In the Messages tab, you can edit the various messages for the form.
- In the Additional Settings tab, you can add extra code to modify the contact form.
- Click Save to update the changes.

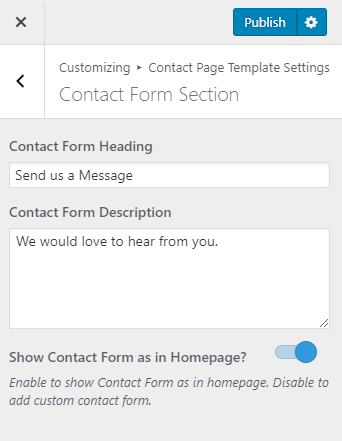
Contact Form Section
You can add Contact Form Heading and Contact Form Description from this section.
- Go to Appearance>Customize > Contact Page Template Setting> Contact Form Section.
- Enter Contact Form Heading and Description.
- Enter the shortcode of the contact form. You can find the shortcode of the contact form at Dashboard> Contact >Contact Forms.
- Enable Show Contact Form as in Homepage ? to show Contact Form as in homepage. (Blue is enabled).
- Click on Publish.

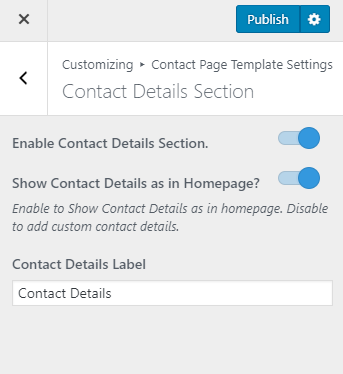
Contact Details Section
You can add the contact information like phone, email, fax…etc. in this section using widgets.
- Go to Appearance> Customize> Contact Page Template Settings> Contact Details Section
- Enable/Disable Contact Details Section. (Blue is enabled)
- Enable Show Contact Details as in Homepage ? to show Contact Details as in homepage. (Blue is enabled). Disable to add custom contact details.
- Enter the Contact Details Label.
- Click on Publish.
Working Hours Section
You can display your company’s hours of operation here.
- Go to Appearance> Customize> Contact Page Template Settings> Working Hours Section
- Enable Working Hours to add working hour details.(Blue is enabled)
- Fill in the details.
- Click Publish.

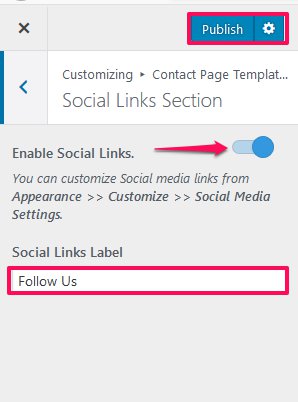
Social Links Section
You can add social media links on your contact page using this setting.
- Go to Appearance> Customize> Contact Page Template Settings> Social Links Section
- Enable Social Links to display Social Icons on your contact page.(Blue is enabled)
- You can customize Social media links from Appearance > Customize > Social Media Settings.
- Enter Social Links Label.
- Click Publish.
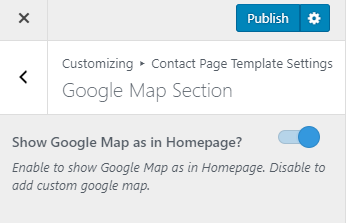
Google Map Section
You can show google map on your contact page using this setting.
- Go to Appearance> Customize> Contact Page Template Settings> Google Map Section
- Enable Show Google Map as in Homepage? to show Google Map as in Homepage (Blue is enabled). Disable to add custom google map.
- Click Publish.
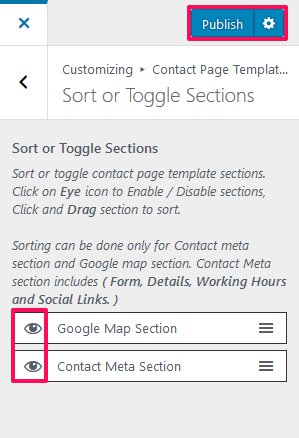
Sort or Toggle Sections
You can Sort or Toggle contact page’s sections here. Sorting can be done only for Contact meta section and Google map section. Contact Meta section includes ( Form, Details, Working Hours and Social Links ).
- Go to Appearance> Customize> Contact Page Template Settings> Sort or Toggle Sections
- Click on Ethe ye icon to Enable / Disable sections, Click and Drag section to sort.
- Click Publish.