
You need to install and activate WP Travel Engine plugin to add trips, destinations, activities, trip types, and to manage bookings and customers information.
After you have installed the WP Travel Engine plugin, add destinations, activities, and trip types and assign them to the trips. For more detail instruction about the use of Wp Travel Engine, please visit the plugin documentation.
Creating/ Adding Destinations
You can add trip destinations along with an image in the theme. Destinations can be countries or cities.
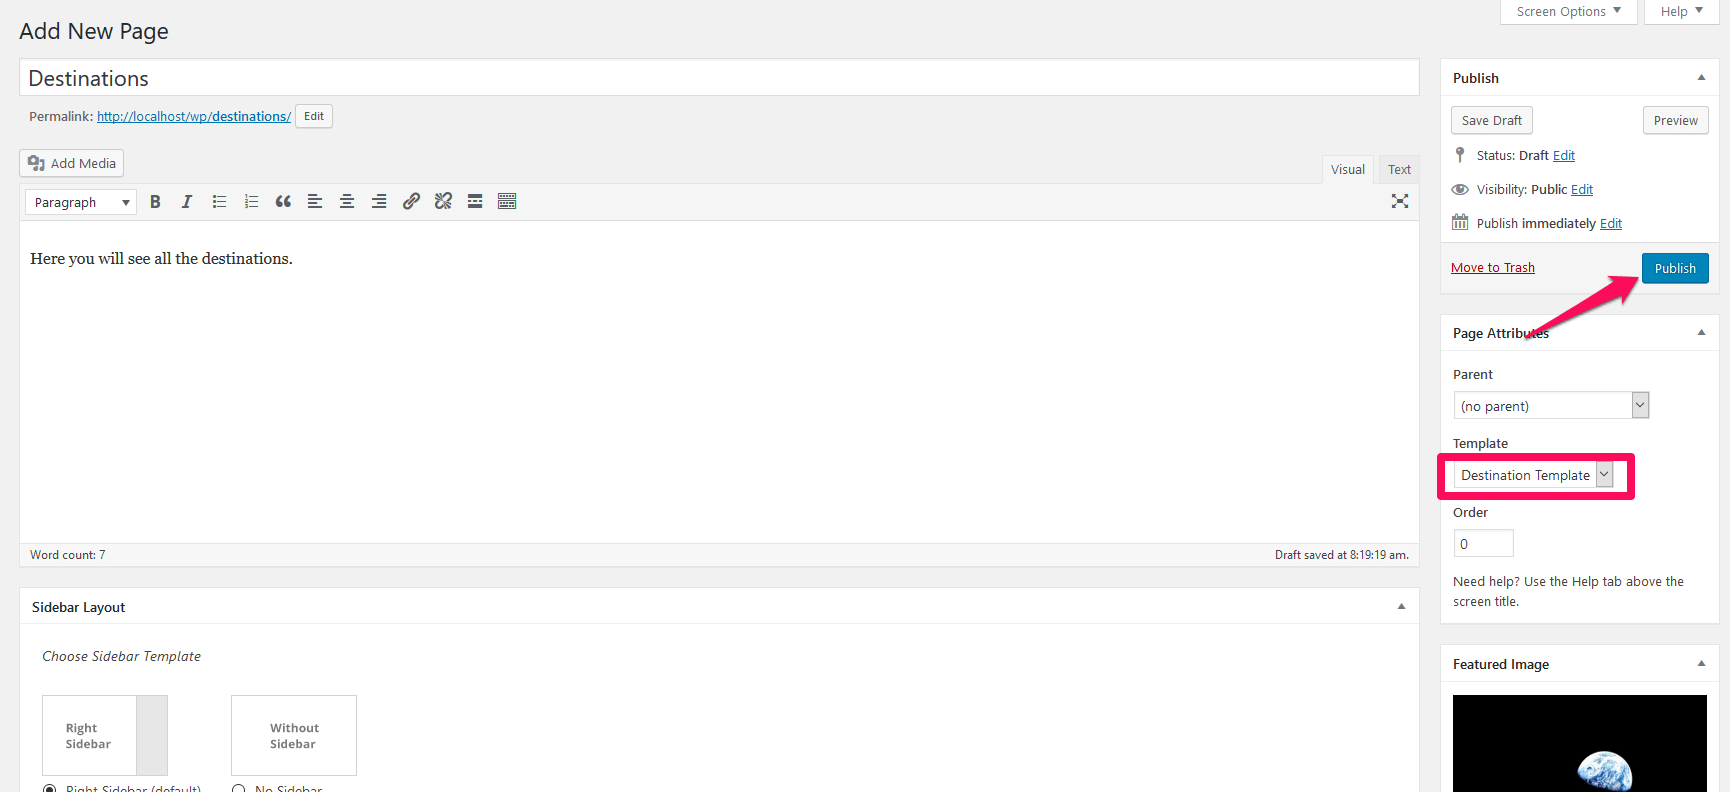
Create a Destinations Archive Page
If you want to show destinations listing page, you need to create a page and assign it to the destination template. The only destinations that have trips will be displayed in the listing page.
- Go to Pages > Add New
- Enter the title and description for the page
- Upload a featured image for the page
- Select “Destination Template” under Page Attributes
- Click Publish
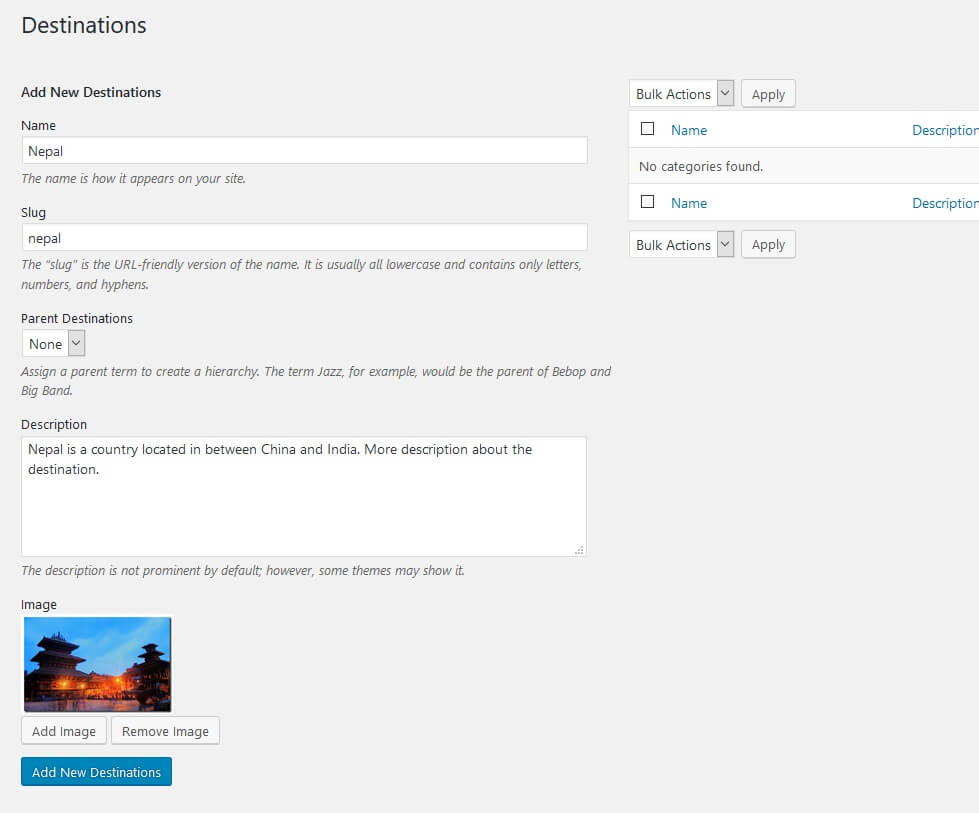
Add destinations
Recommended Image Size for Destinations: 300 x 275 px
- Go to Trips > Destinations. You can add new destinations or edit already existing destinations here.
- Enter the name, slug, and description of the destination. The description of the destination is displayed in the single destination page. The single destination page displays all the trips associated with the destination.
- Upload an image for the destination. The image will be displayed as a thumbnail in the destinations archive page.
- Click on Add New Destinations button