

You can edit what to display on your contact page here. You should create a contact page first.
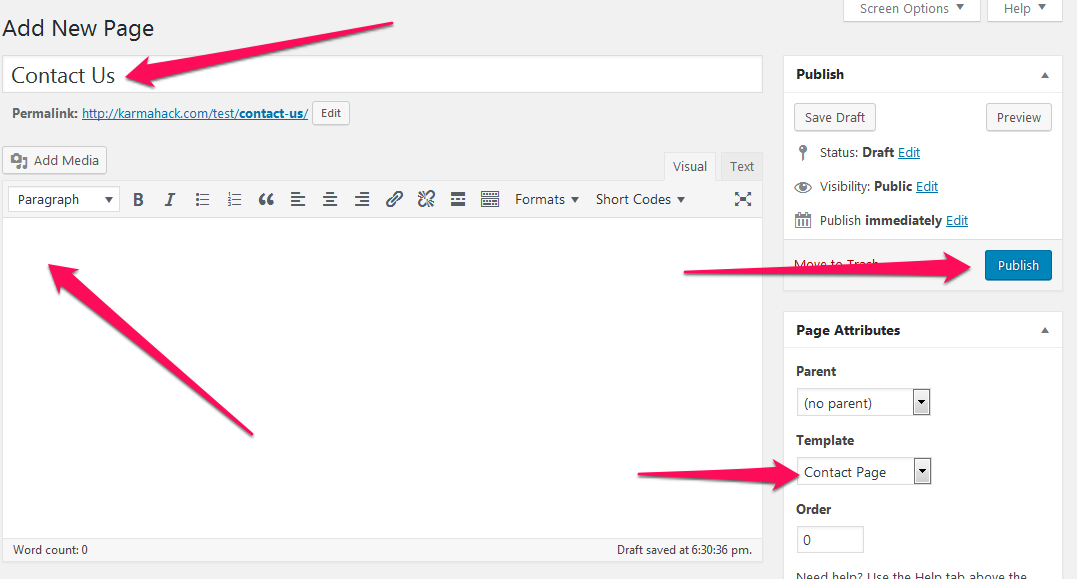
Create a Contact Page
- Go to Dashboard > Pages > Add New.
- Enter the Title for the contact page.
- Enter the contents for the contact page in content area.
- Choose “Contact Page” Template
- Click on Publish.
Configure Contact Page
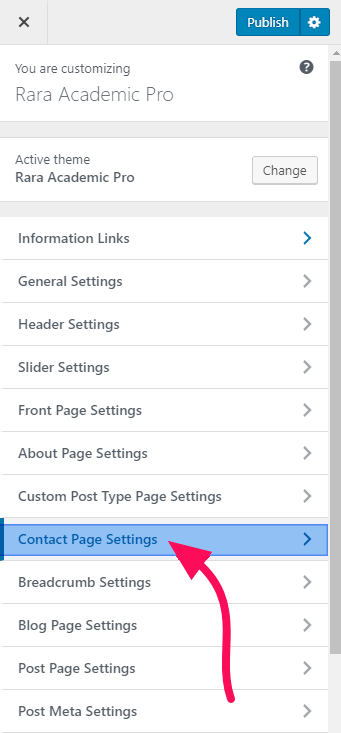
- Go to Appearance> Customize> Contact Page Settings
- Go to the Contact Page on your website to customize the contact page
Contact Details Settings
You can use the same contact details as in the homepage’s contact section or use new contact information here.
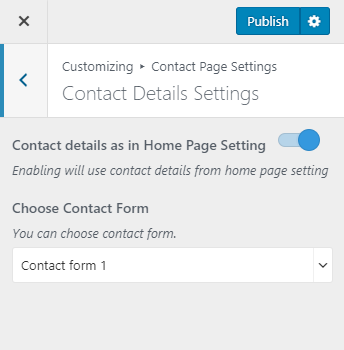
- Go to Appearance> Customize> Contact Page Settings > Contact Details Settings
- Enable “Contact details as in homepage settings” to import contact from the homepage’s contact section (Blue is enabled).
- Choose the Contact Form from the drop-down.
- Click on Publish
Note: You need to have Contact Form created before configuring the Contact Details Settings. You can create a Contact Form by going to Dashboard> Contact> Add New
Google Map Section
Here, you can add a google map on your contact page and home page, and edit it.
- Go to Appearance> Customize> Contact Page Settings > Google Map Section
- Enable/Disable Google map
- Enable/Disable Google map on the homepage
- Click Publish.

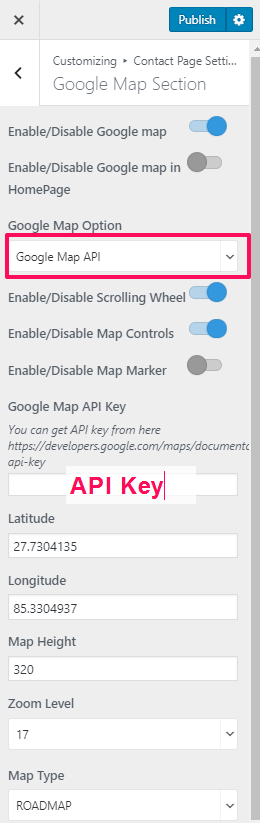
Google Map API
- Enable Google Map. (Blue is enabled)
- Enable Google map in HomePage to display google map in the home page. (Blue is enabled)
- Enable Scrolling Wheel to display a scrolling wheel on the map
- Enable Map Controls to display map controls
- Enable Map Marker to display map marker
- Enter the Google Map API key. (You can get API key from here)
- Enter latitude and longitude of the location
- Enter the Map Height to be displayed on the contact page
- Select Zoom Level and Map Type
- Click on Publish
Google Map iFrame
- Enable Google Map
- Enable Google map in Homepage to display google map in your front page. (Blue is enabled)
- Enter Google Map iFrame
- Enter the iFrame code in the Google Map IFrame box.
- Click on Publish.
