
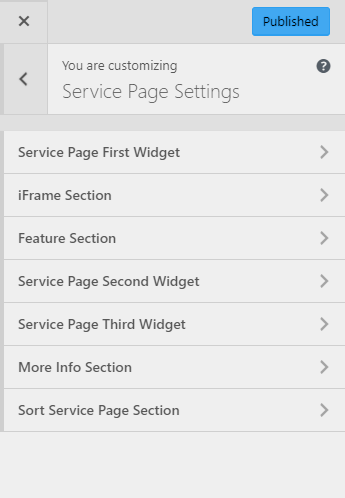
Go to Appearance> Customize> Service Page Settings to configure different aspects of Service Page
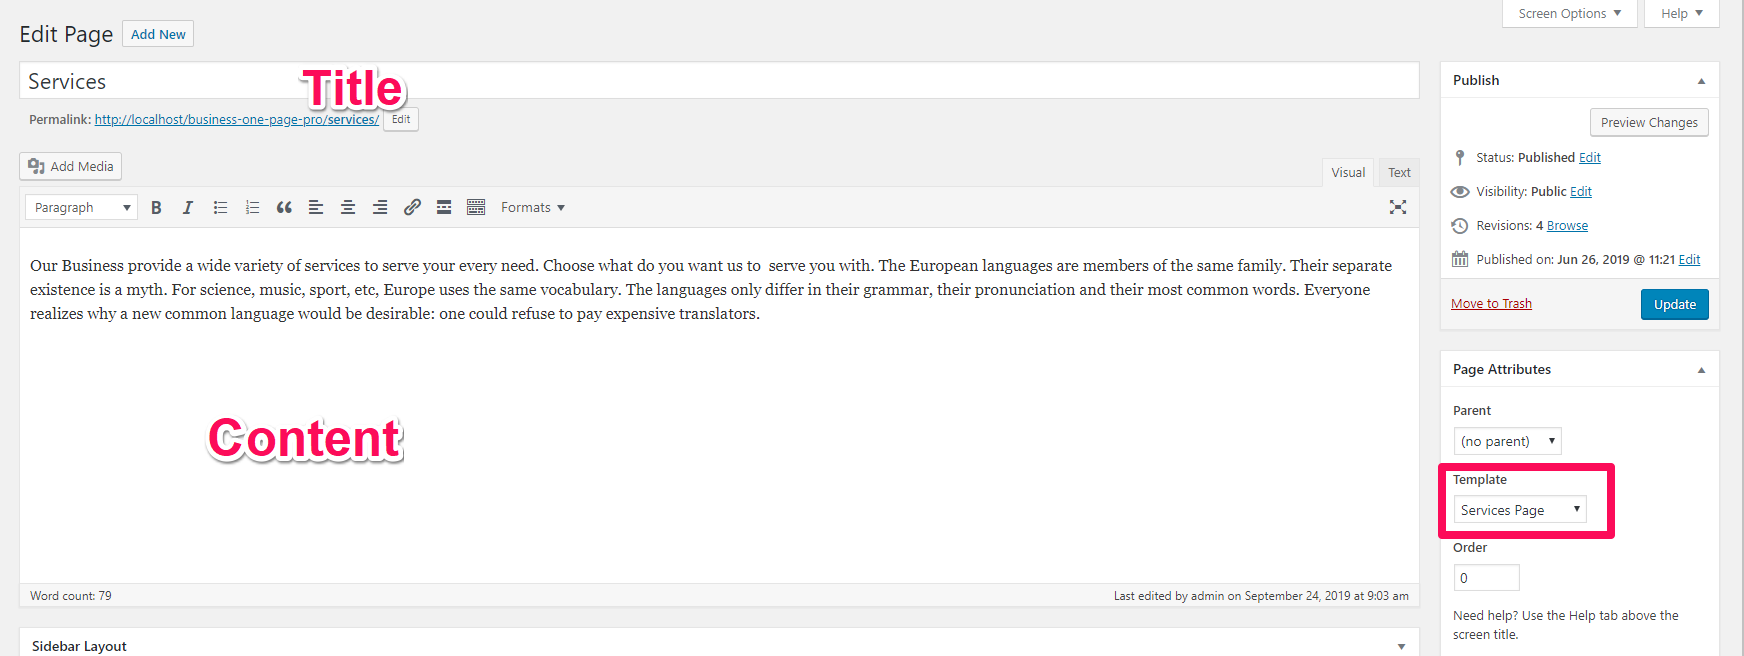
You’ll first need to create a page with Service Page Template
- Go to Dashboard > Pages > Add New
- Enter page tile and content
- Select Service Page from the Template drop-down menu
- The title of the page will be displayed as your Service Page Title
- The content of the page will be displayed as Service Page Overview
- Click Publish
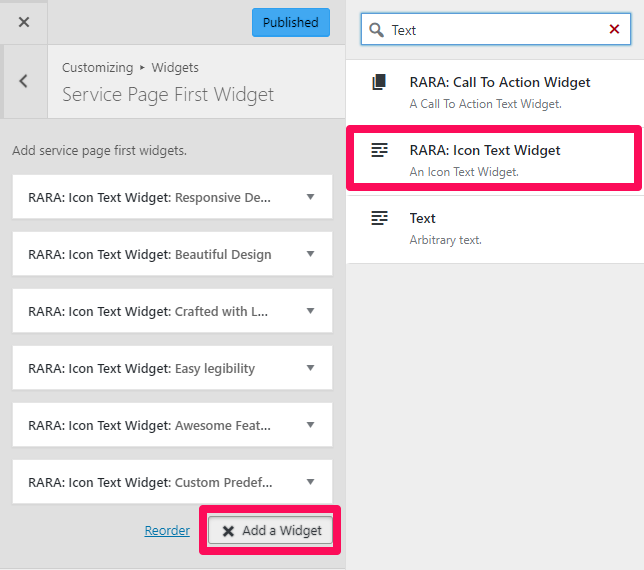
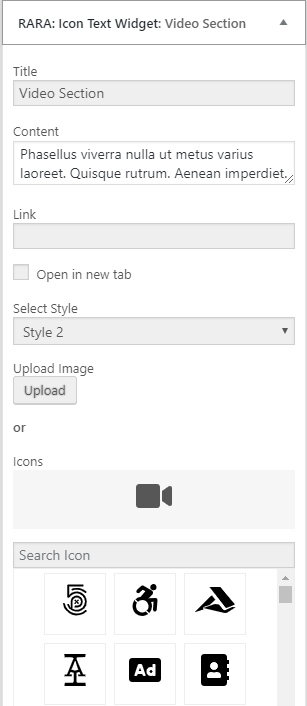
Service Page First Widget
Please follow the below steps to configure Service Page First Widget section
- Go to Appearance > Customize > Service Page Settings > Service Page First Widget
- Click Add a Widget and add Rara: Icon Text Widget
- Enter Title, Content, and Link.
- Check Open in new tab to open the link in a new tab.
- Select the desired style under Select Style drop-down menu
- Upload Image or select an Icon
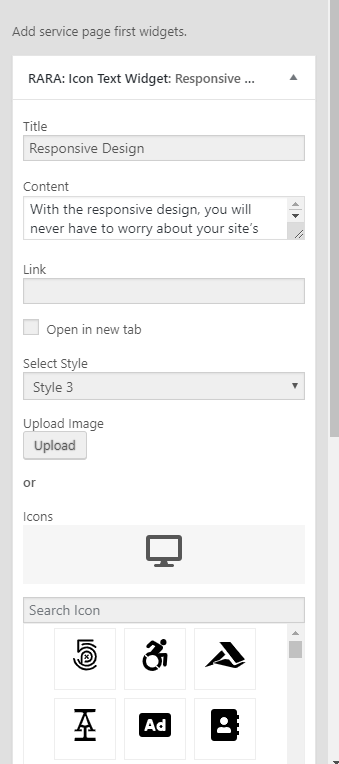
- Click Done
- Add more Rara: Icon Text Widget and follow the same process
- Click Publish when done
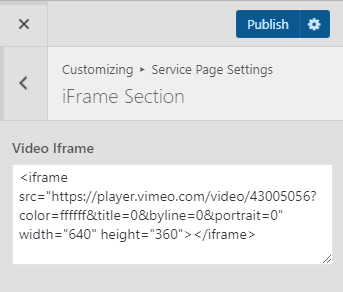
iFrame Section
Please follow the below steps to configure iFrame Section
- Go to Appearance> Customize> Service Page Settings> iFrame Section
- Enter Video iframe
- Click Publish.
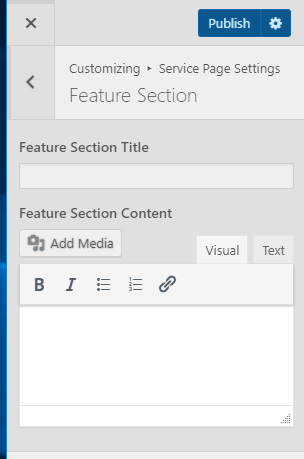
Feature Section
Please follow the below steps to configure Feature Section
- Go to Appearance> Customize> Service Page Settings> Feature Section
- Enter Feature Section Title
- Enter the content
- Click Publish.
Service Page Second Widget
Please follow the below steps to configure Service Page Second Widget
- Go to Appearance > Customize > Service Page Settings > Service Page Second Widget
- Click Add a Widget and add Rara: Icon Text Widget
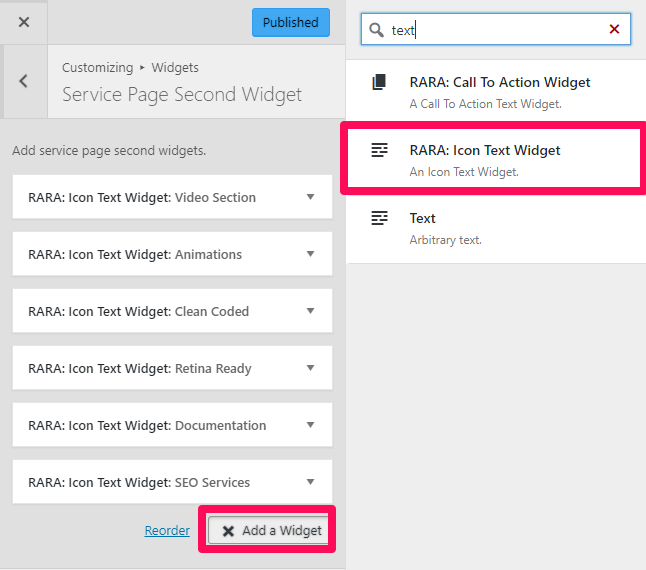
- Enter Title, Content, and Link.
- Check Open in new tab to open the link in a new tab.
- Select the desired style under Select Style drop-down menu
- Upload Image or select an Icon
- Click Done
- Add more Rara: Icon Text Widget and follow the same process
- Click Publish when done
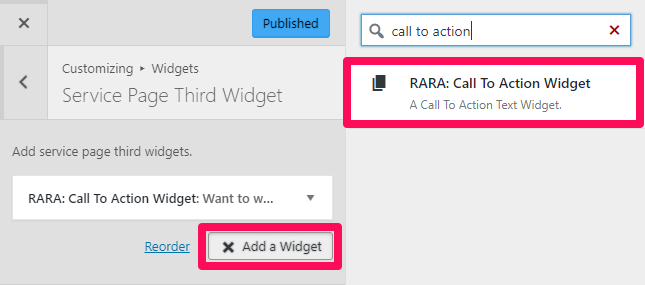
Service Page Third Widget
Please follow the below steps to configure Service Page Third Widget
- Go to Appearance > Customize > Service Page Settings > Service Page Third Widget
- Click Add a Widget and add Rara: Call to Action Widget
- Enter Title and Content
- Enter Button Text and Button Link. If no Button Link is entered, then your Button Text will not be displayed
- Check Open in new tab to open button link in new tab
- Choose the desired style under Select Style drop-down menu
- Select a Background Color or Background Image. If both background image and color are selected, background image is displayed by default.
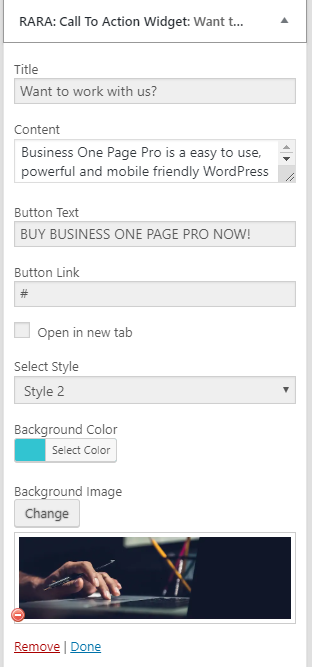
- Click Done
- Click Publish when done
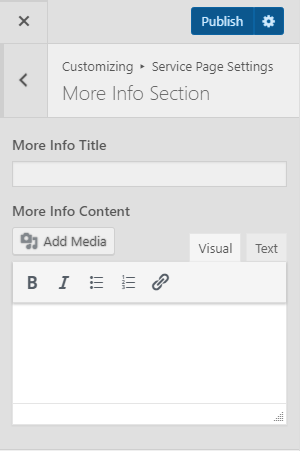
More Info Section
Please follow the below steps to configure More Info Section
- Go to Appearance> Customize> Service Page Settings> More Info Section
- Enter More Info Title
- Enter your content
- Click Publish.
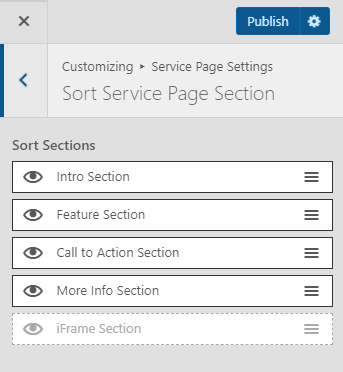
Sort Service Page Section
Please follow the below steps to configure Sort Service Page Section
- Go to Appearance> Customize> Service Page Settings> Sort About Page Sections
- Click on the eye Icon to show or hide the section.
- Use drag and drop to sort the section.
- Click Publish.