

After you have the latest version of WordPress, save the downloaded University Zone free theme file somewhere handy on your computer, as you will be using the included files for the rest of the installation process.
The University Zone free theme file includes:
A WordPress Theme Files (in .zip format) — This (university-zone.zip) is a compressed WordPress theme file containing all of the required templates, images, and icons required for the theme to function properly.
Note for Safari users (macOS): If you are using Safari to download the theme file, the file may unzip automatically. So, make sure your theme file is in .zip format. Here’s how to stop Safari from automatically unzipping your .zip file.
Please follow the below steps to install the University Zone on your website:
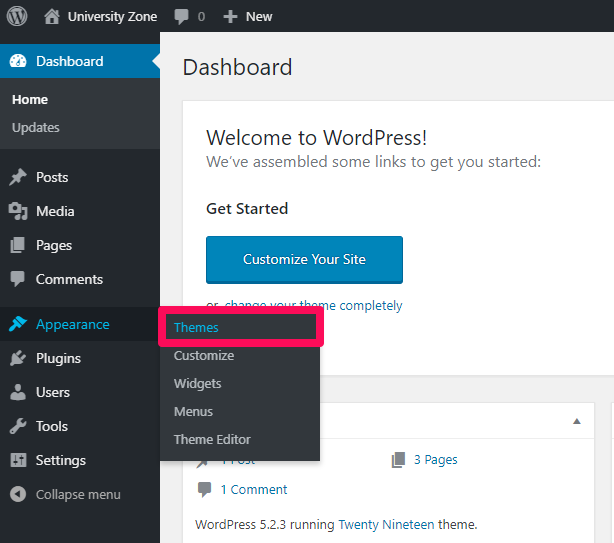
- Go to Appearance > Themes.
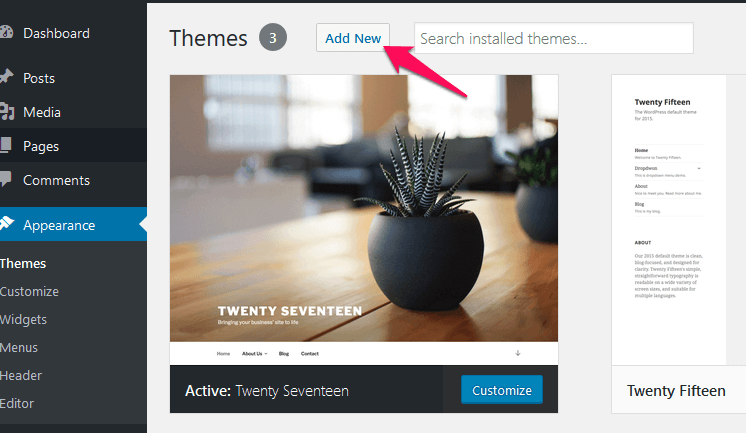
- Click on Add New button
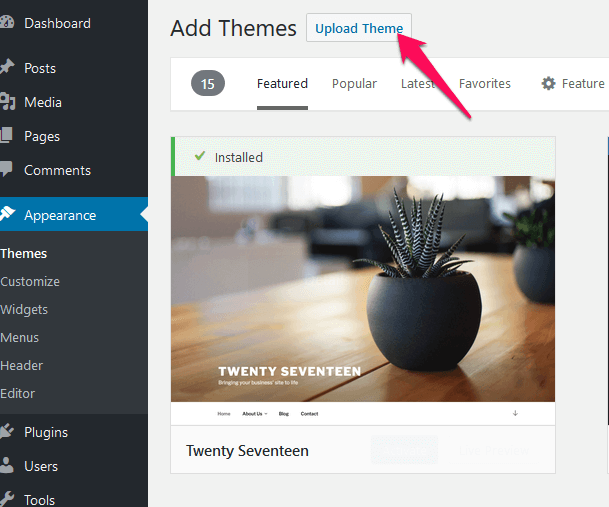
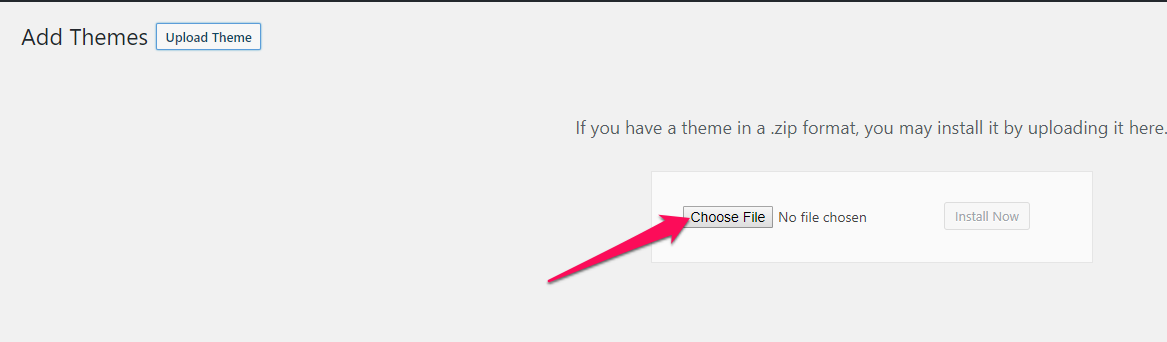
- Click on the Upload Theme link.
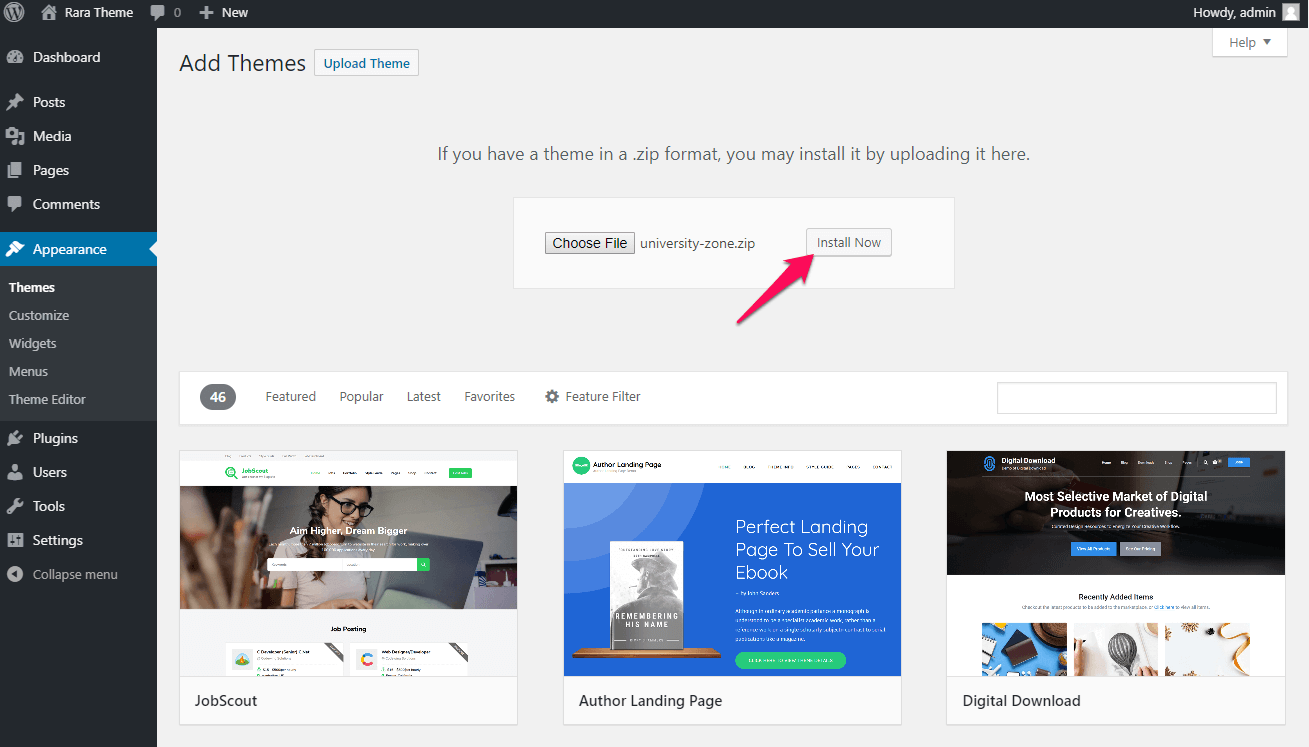
- Click on “Choose File”, select “university-zone.zip” file from your computer and click upload.
- Click Install Now
- After the theme is installed, click on “Activate” to use the theme on your website.
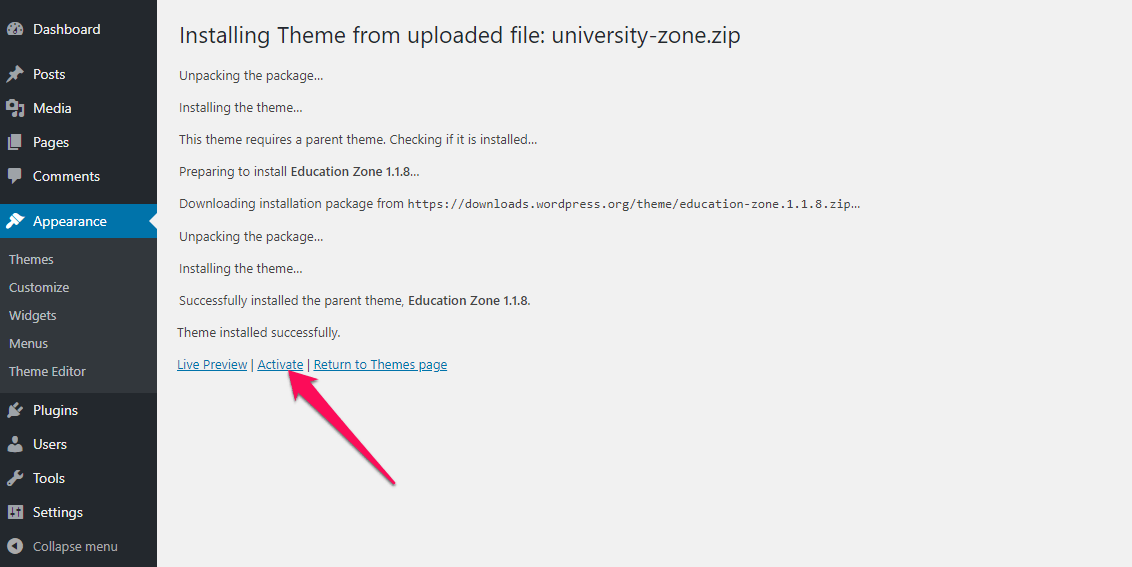
Note regarding Parent Theme: If you are installing University Zone theme offline, make sure you have Education Zone Free WordPress Theme installed. You need the parent theme to install the child theme. However, if you are connected to the Internet, the parent theme (Education Zone) will be installed automatically from the WordPress repository, so you don’t have to worry about it.