
Creating/Adding/Configuring Trips
You can add trip details and assign them to destinations, activities, and trip type.
- Log in to WordPress Admin Panel.
- Go to Trips > Add New
- Enter the trip name in the title section.
- Enter the trip description in the description section
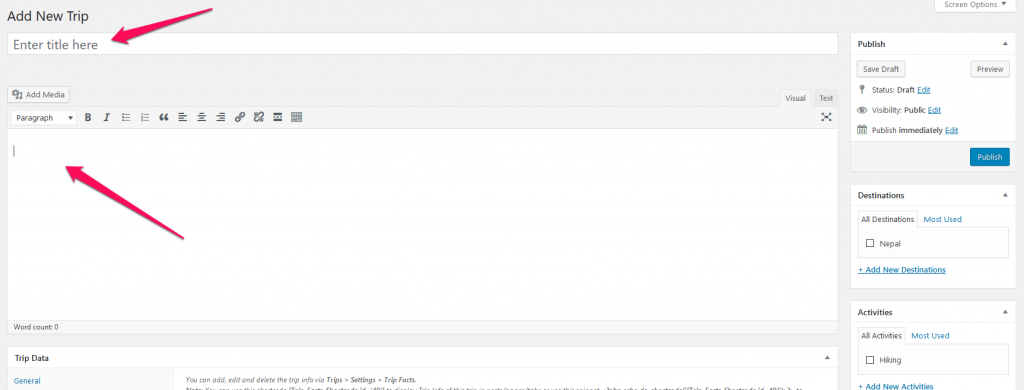
- Enter Trip Data in the Trip data section. You can enter the price, discounted price, and duration of the trip in the “General” tab. You can enter extra trip information like group-size, transportation, etc. in the “Trip Info” tab. You can add more trip info fields from Trips > Settings > Trip Info.
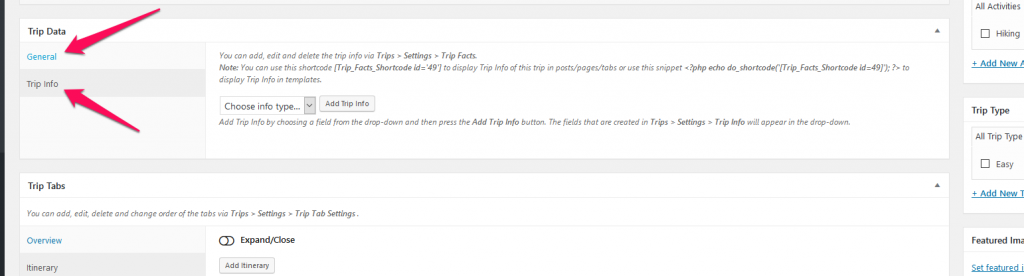
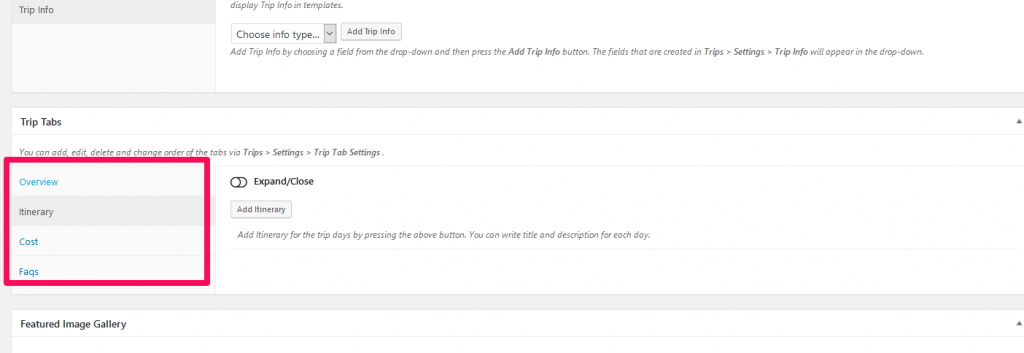
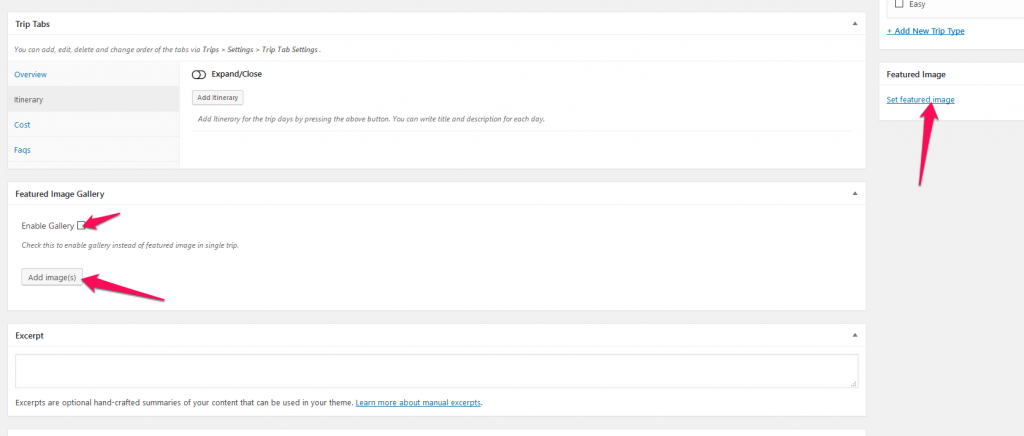
- Enter Overview, Itinerary, Cost, and FAQs of the trip in Trip Tabs section. The tabs will be displayed on the trip page. You can also add extra tabs or sort the order of the tabs by going to Trips > Settings > Trip Tab Settings.
- Upload Featured Image for the trip in Featured Image section. You can also display a gallery instead of a single featured image. To enable gallery, check “Enable gallery” in the Featured Image Gallery section and add images.
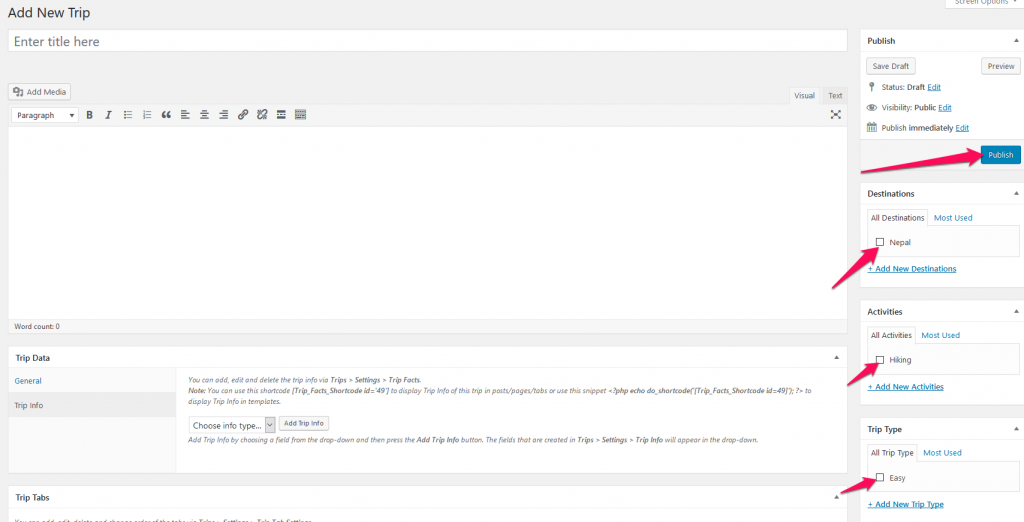
- Assign Destination, Activities, and Trip Type for the trip. The trip without a destination will not be displayed
- Click Publish.