
You can configure your Trips settings by creating Checkout, Terms and Conditions, Thanks, and Confirmation Pages, creating email templates, managing payment methods, and adding extensions from WP Travel Engine > Settings
Checkout, Terms and Conditions, Thanks, and Confirmation Pages
Go to WP Travel Engine > Settings in the WordPress admin dashboard. Then, on the Page Settings, select the pages for checkout, terms and conditions, thank you message, booking confirmation, user dashboard, and trip search results.
Email Templates and Receipt Templates
You can edit the email and receipt templates from WP Travel Engine > Settings > Emails
Creating Menu of Trips, Destinations, Activities, and Trip Type
By default, the trips, destinations, activities, and trip types are not displayed in the Menu settings. So, to add the custom posts on the menu, you need to enable them.
- Go to Appearance > Menus in the WordPress Dashboard
- Click on Screen Options at the top of the page.

- Check the Trips, Destinations, Activities, and Trip Type option in the screen options.
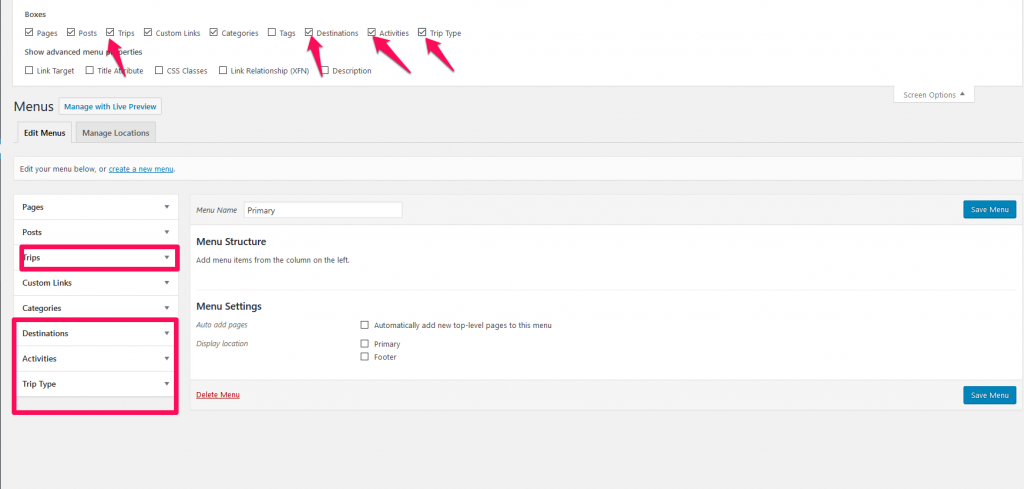
- Select the items you want to display in the menu and follow the creating menu instruction here.