
Please follow the below video tutorial or the following steps to configure Contact Settings
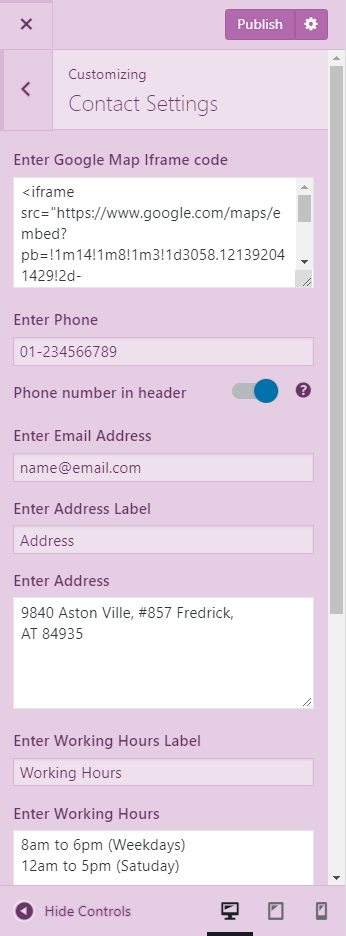
- Go to Appearance> Customize>Contact Settings
- Enter Phone Number
- Check Phone number in header to display phone number in the header. (Blue is enabled)
- Enter Email address, Address Label, Address, Working Hours Label, Working Hours.
- Enter Contact Form title, Description, and Shortcode
- Click Publish when done
Note: For the Contact form to appear as in the demo, you must first install and activate the Contact Form 7. To learn about how to install plugin read the Installing Plugin. For configuring the Plugin read the plugin documentation.
Generating Shortcode for the Contact Form as in Demo :
- For the Contact form to appear as in the demo, you must first install and activate the Contact Form Seven. To learn about how to install plugin read the Installing Plugin.
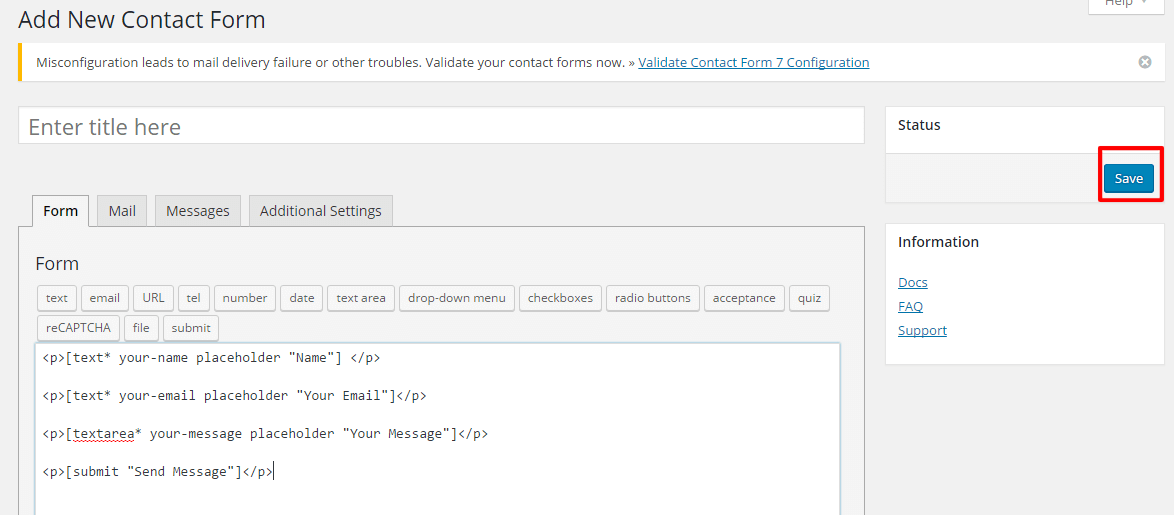
- Go to Dashboard> Contact> Add New

- Enter your Contact form styling
- Click Save.
Copy the shortcode that appears below the Contact Form Name and paste it in the Contact Section Contact Form from Appearance>Customize>Homepage Settings>Contact Section. Configure other settings according to Contact Form 7 Documentation
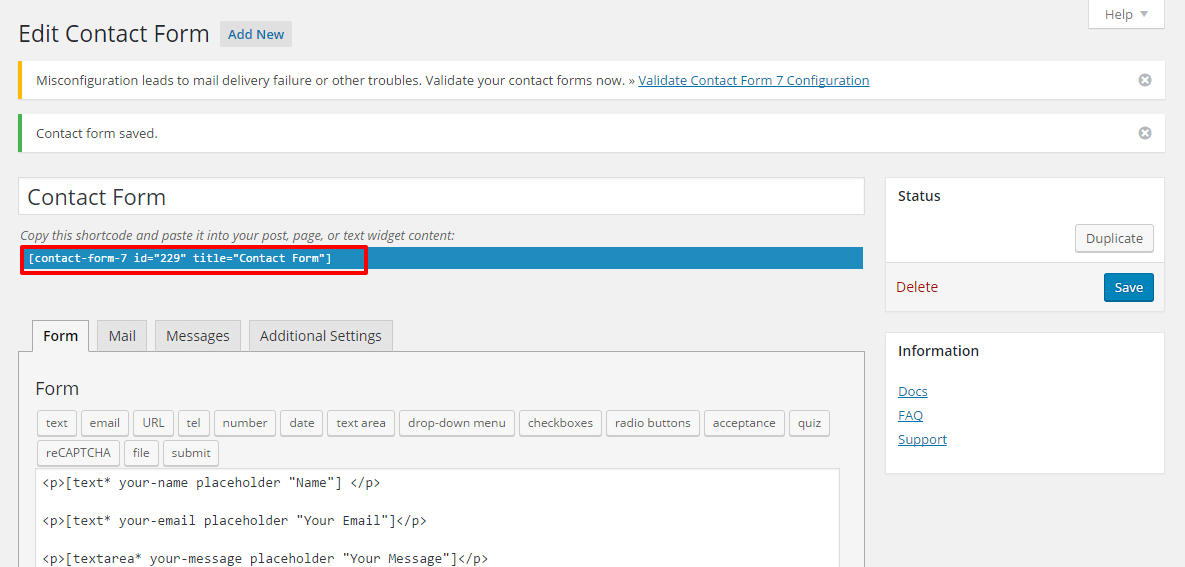
Click Save & Publish. Note: The above instructions just deals with appearance of the contact form on the theme. You still need to configure your settings following Contact Form 7 Documentation